E-3 Sentry AWACS 1/144 Minicraft Kit #14526 Review
RoR Step-by-Step Review 20111107* – E-3 Sentry AWACS 1/144 Minicraft Kit #14526 Review
Click Here to Buy This Kit
Â
Â
Review and Photos by Marty & Stephanie Oberman 
Â
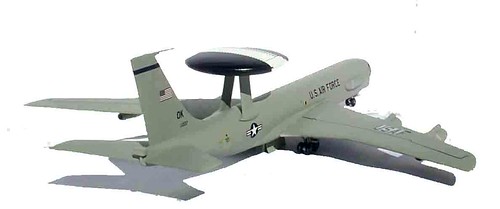
The E-3 Sentry is based on the Boeing 707 jet, converted by the U.S. Air Force for recon use. The “AWACS” version (Airborne Warning and Command Systems) is but one of various versions of this aircraft offered by Minicraft, judging by the fact the modeler is directed to open certain holes in the fuselage to accommodate the appropriate communications and probe pods associated with this particular version.

Fig 000a) This is the kit and its contents which was well packaged as Minicraft models usually are.
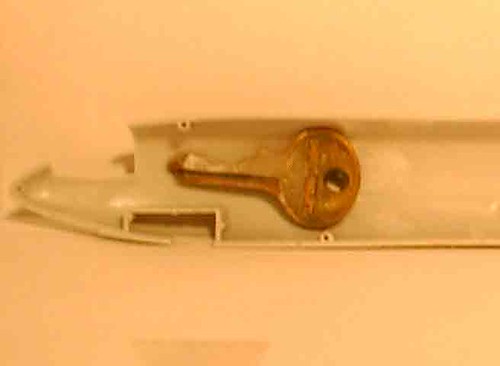
Fig 001) The instruction sheet on this assembly calls for 3/4 oz. nose weight to be placed in the forward fuselage, in order to keep the aircraft from “tail-dragging”. I accomplished this feat by gluing a metal key in each half of the forward fuselage. The instructions also call for the cockpit interior to be painted black. I skipped this part since there not only is no interior to be seen, but the entire windscreen, although a clear part contains part of the forward fuselage and would need to be painted the same color. In fact, the decal sheet includes “blacked-out” decals for the windows, making the clear part a moot point. After opening the appropriate holes in the fuselage and attaching the communications pods.

Fig 001a) I glued the fuselage together and installed the windscreen. I also installed the rear horizontal stabilizers in place, and then painted the entire assembly Testor’s Light Sea Gray. There were no fit problems other than the usual gaps where the pods met the fuselage which needed to be filled.

Fig 2) Next I assembled the wings and engines/pylons. The wings mated smoothly, but the engine nacelles, which contain disks representing the turbines and compressors, were a different story. The compressor disks were oblong in shape, and the nacelle halves were tricky to assemble since the locating points inside the nacelles for both turbine and compressor disks were vague, at best. The two-piece nacelles did not conform well to one another, and some deft maneuvering was required to keep them “square” after gluing them together. I painted the outer ring of the nacelles, as well as their interiors, aluminum. The wings, pylons, and nacelles were painted Light Sea Gray.
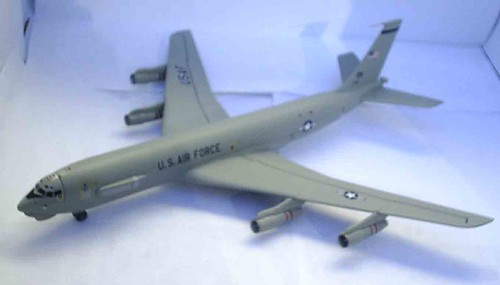
Fig 003) After the wings were assembled, I decided to apply the decals to the aircraft before installing the landing gear. Due to the delicate nature of the landing gear struts, one of which snapped in half while still on the tree, I decided this would be my best recourse. Minicraft wisely uses Cartograf decals, made in Italy and in my opinion are the best decals around. They did not disappoint me. Although they proved a bit stubborn to remove from their paper backing, they laid down smoothly and were relatively easy to adjust into their proper positions on the aircraft.
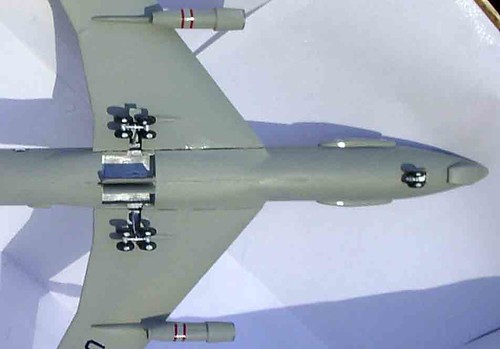
Fig 005) Once the decals were dry, I began the process of installing the landing gear assemblies. This proved trickier than I thought. The left and right main landing gear (as well as the nose gear) contain very delicate struts and supports, and one of the contact points for the tires on the starboard side snapped off while I was attempting to install the tires to it. None of the mounting points for either the struts, supports, nor landing gear doors is specific, leaving the modeler to guess how they should be mounted. I did my best to install these items; however, as a result the main landing gear doors protrude further than the tire/strut assembly, resulting in the wheels not touching the surface due to their interference. This modeler suggests attempting to cant the doors further outward so the wheels touch the ground. Unfortunately the doors were installed before the landing gear. Thankfully there were no issues with the nose landing gear or its respective doors. If I’m building aircraft, I prefer to keep my wheels “on the ground”. The kit provides the modeler with the option of retracted landing gear by including wheel well covers.
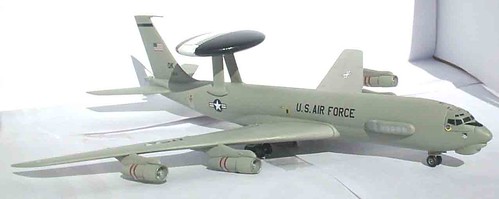
Fig 006) The last items I installed were the tail elevator probe and the radome. The probe was hassle-free to install, and Minicraft wisely suggests this installation occur at the end of the entire assembly, due to its fragile nature.
The rear-mounted radome consists of two round discs and two mounting pylons. I glued the two discs together while still on the tree. The instructions call for a .5556″ white stripe around the entire disc, both top and bottom. I used 1/2″ wide Scotch tape to mask off the white stripe after painting in order to accommodate the black remainder of the disc. The decals did not completely cover the white stripe after the tape was removed, since the tape was wider than the decal. From a distance though, the result looks somewhat acceptable (insert pix #6 and #7 here).
Final impressions: I would give this kit a weak 2 stars out of a possible 5. The Cartograph decals themselves saved this kit from being rated lower, especially given the fit issues I encountered during the build process. The Minicraft Boeing 707-based E-3 Sentry is apparently available in other versions, hence the number of parts left over from this particular kit. It seems Minicraft used a “one-size-fits-all” approach when tooling (or re-tooling, as the case may be) this kit. For the casual modeler, this kit is adequate for producing the AWACS Sentry, with a bit of work. For the contest-entry-minded builder, the kit falls woefully short.
Would I build this kit again? Most likely not. Although I do like a lot of Minicraft’s automotive subject kits (namely the Triumph TR-3 kits, among others), it almost seems that they bit off a bit more than they could chew in hastily releasing the Sentry kits. A little more tooling time and attention would have gone a long way in this particular subject’s case.
Â
*All Registered trademarks are the property of their respective brands.
Â


