1978 Pontiac Firebird 3n1 1/24 Revell 85-4927 Review
RoR Step-by-Step Review 20111230* –1978 Pontiac Firebird 3n1 1/24 85-4927 Review
Click Here to Buy This Kit
Â
Review and Photos by Stephanie and Marty Oberman 
Â
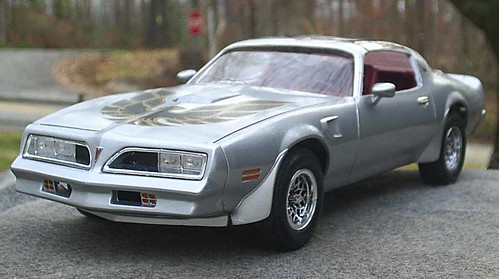
I agreed to review this particular kit for two reasons: first, I hadn’t built it before, and second (and most importantly) it reminded me of the ’79 Trans-Am my neighbors who I grew up with owned. They’ve both passed on, but I have fond memories of them, they were like step-parents to me. I decided then and there I would build this car in the same color scheme as theirs: silver with maroon interior.
Â
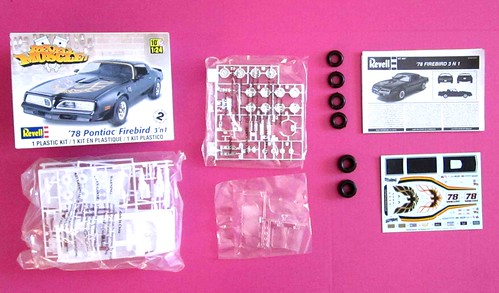
(Fig. #1) – For the Modeler: Even though this kit has been around a while it’s in pretty good shape for the intermediate to advanced modeler. There is one issue that must be addressed for a proper fit. There are drag and movie car optional parts. Strategic clamping of sub-assemblies is needed to insure a proper fit in some places and some instruction errors are highlighted in this review.
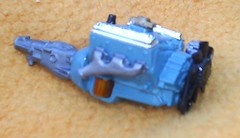
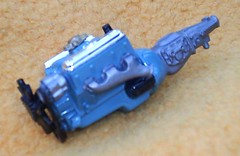
(Fig. #3, 4) I began with the engine. Being older tooling, the engine is rather primitive compared to today’s standards. The two-piece engine block/tranny contains the oil pan, starter, and oil filter molded in. The separate intake manifold has a molded-in distributor. Separate carburetor, cylinder heads, front cover, exhaust manifolds, fan belt/pulley assembly, alternator (chrome), fan, and chrome valve covers round out the components. I stripped the chrome from the alternator and painted it Testor’s stainless steel buffing metalizer, the exhaust manifolds magnesium, fan and pulleys gloss black (with flat black fan belt), and left the valve covers chrome. I assembled the block, intake manifold, and front cover and painted them DupliColor Pontiac engine blue as a unit, then detail-painted the starter and distributor gloss black, and the oil filter my signature silver base with Tamiya clear orange over that. I painted the tranny magnesium.
As crude as the engine is, everything fit together well, and decently represents the Pontiac 6.6L V-8 power plant. The kit also contains a chrome high-rise dual-carb intake manifold, dual carb setup, and tiny air cleaners for the racing version.Â
Â
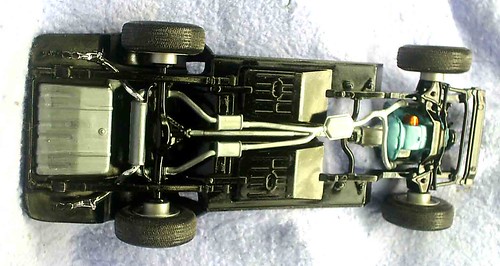
(Fig. #6) – I moved on to the chassis. I painted the chassis pan itself semi-gloss black and detail-painted the molded-in gas tank Testor’s stainless steel buffing metalizer. The two-piece rear axle assembly contains the leaf springs, exhaust system, and driveshaft molded in. After painting the unit gloss black, I picked out the exhaust system and driveshaft with stainless steel metalizer and installed it onto the chassis with no problems. The separate rear shocks were also non-problematic to install. Separate chrome tailpipe extensions installed without a hitch. I detail-painted the ends flat black to simulate an opening. There were no positive contact points on these pieces, but there were no issues installing them. The one-piece front suspension also installed seamlessly, with large, positive contact points. As crude as the components were, the finished chassis with mounted engine looks rather nice. The only issue was lining up the forward exhaust pipe tips to the exhaust manifolds. A bit of CA glue and clamping convinced them to line up properly. The kit also contains riser blocks for the rear leaf springs to raise the rear end for the drag version.
Â
Â
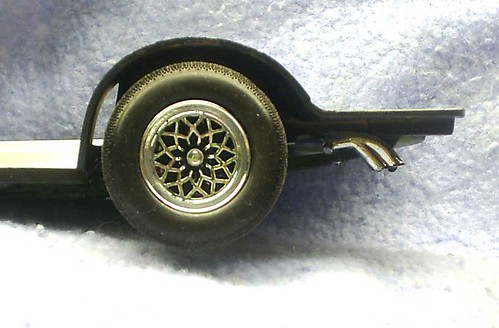
(Fig. #8) – There are two sets of tires for this kit; four standard stock tires and two drag slicks for the race version. Stock rims are the typical Firebird/TA “Honeycomb” rims, which I used and detail-painted the recesses flat black. There are also eight “Centerline” solid rims, two for the slicks and the remainder for whatever the builder wishes to use them for. The wheel backs have separate retainers in case the builder wishes to allow the car to roll freely. I glued mine to prevent just this. The tire/rim assembly attached to the chassis’ spindles with no problems and looks good.
Â
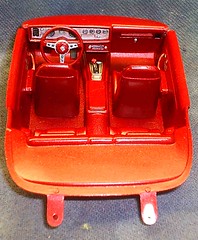
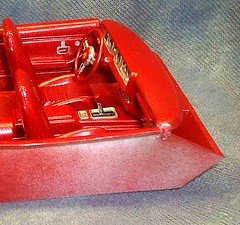
(Fig. #9, 10) – Moving on to the interior: it is an older bucket style with rear seat and console molded in, two-piece separate front seats, separate arm rests, dash, chrome shifter, and steering wheel. The accelerator, brake and clutch pedals are molded into the interior bucket. I painted the interior Testor’s Honduras Maroon acrylic lacquer to simulate my neighbors’ car’s interior color, detailed the instrument gauge area silver, as well as the spokes on the steering wheel, then appointed the gauges themselves with various colors to highlight them. I did the same with the door handles and window buttons. The interior fell together seamlessly, and looks good when completed. The only issue I encountered during this assembly was the interior sides were wider than the dashboard, preventing it from seating into the interior properly. I used a large “C” clamp to squeeze the tops of the interior sides together enough for the dashboard to fit correctly.
Â
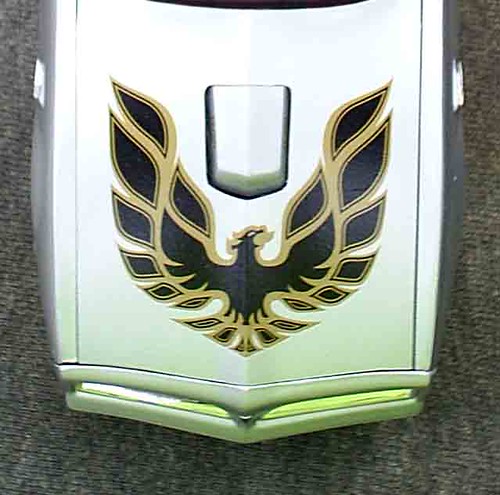
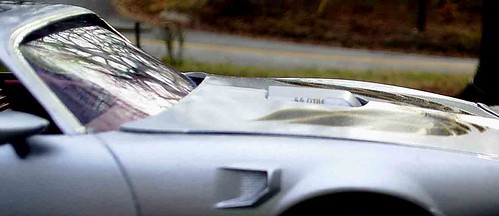
(Fig. #16) – I then turned my attention to the body. Since the interior was Honduras Maroon, I sprayed the upper interior parts that color, allowed it to dry, masked it off, then sprayed the engine bay semi-gloss black. Masking off the engine bay and inner fender wells, I then glued the side-view mirrors in place and primed and painted the body DupliColor Silver Charcoal metallic acrylic lacquer, similar to the color of my neighbors’ 1:1 vehicle. The front and rear valances are separate pieces, so I taped them onto the body while I sprayed it for a more uniform look. The hood scoop is recessed into the hood and actually attached to the engine (via the air cleaner assembly), was painted separately. I decided at that point to apply the “Screamin’ Chicken” hood decal, scoop “6.6 Liter” decals, nose Pontiac emblem decal, and side marker lights decals, along with the small “Screamin’ Chicken” decals for the B-pillars. The decals applied nicely and look and fit right. The windows, while absent of any positive contact points, nevertheless installed without any problems, as did the rear-view mirror. At this time I installed the chrome taillights into the body. I earlier painted them with Tamiya clear red paint, and extended the red into the backup light portion of the lens. Looks right.
Â
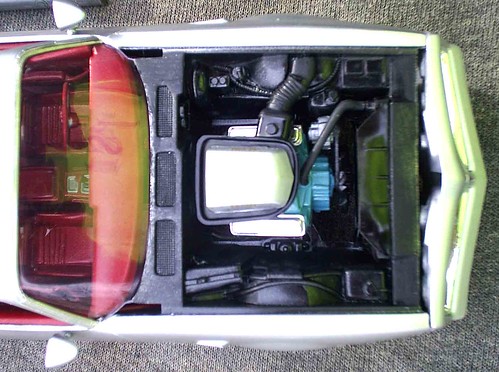
(Fig. #17) – It was now time to put everything together. The interior has two tabs with holes at the rear which insert into two pins in the body behind the rear window, making placement of the interior positive. There are no contact points for the front of the interior bucket, but since the chassis has two pins which insert into the body’s inner fender wells, as well as contact points on the bottom of the interior for the chassis as well, it was a moot point. Once the body was installed on the chassis, it clamped the front of the interior down without issue. The radiator slid into the radiator wall with no problem either. I then installed the upper radiator hose and the air cleaner, which consists of a bottom piece with ducting to the side of the engine bay, along with a hood scoop that protrudes out onto the hood opening.
Â
Â
(Fig. #18) – Unfortunately, as was the case with the box art car, the scoop did not protrude out onto the hood enough. The 1:1 car’s scoop was at least 2/3 visible when the hood was closed. This model’s scoop barely poked through the hood’s opening. This is something that Revell should address and rectify.
Â
Â
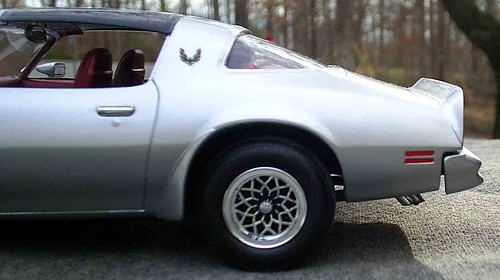
(Fig. #15) – I had some difficulty installing the rear bumper on the body since the rear of the chassis protruded too far out from the body, resulting in the rear bumper jutting out and not fitting properly. My advice to the modeler is to shave at least 1/8″ off the plastic all the way across the rear of the chassis so the bumper fits flush. I wish I could have done this before painting and finishing both the chassis and bumper. The box art car is black, so this discrepancy is not very noticeable in the photos, unless they were retouched. The front fascia contains chrome grille/headlight bezels with clear headlight lenses.
Â
Â
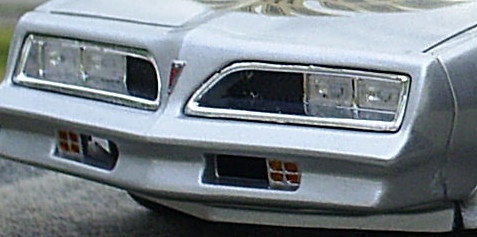
(Fig. #14) – I detail-painted the grille black to give the car a more muscular appearance. The clear headlight lenses installed beautifully, as did the grille bezels, into the front fascia. The fascia installed without issue and looks right.
Â
Â
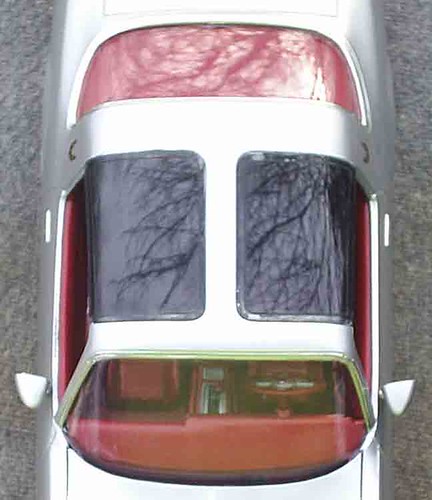
(Fig. #12) – Lastly, I installed the T-top clear glass panels, which I tinted black using Testor’s Transparent Window Tint spray. The instruction sheet calls out panel #69 to be installed on the passenger side and part #70 on the driver’s side. This is completely backward…part #69 should be installed on the driver’s side, and #70 on the passenger’s side. Note: the kit contains a CB radio and antenna if the modeler chooses to replicate the “Smokey and the Bandit” car driven by Burt Reynolds in the movie of the same name. I chose to forgo these options, but it’s nice to know Revell included them in this kit…just in case.
Â
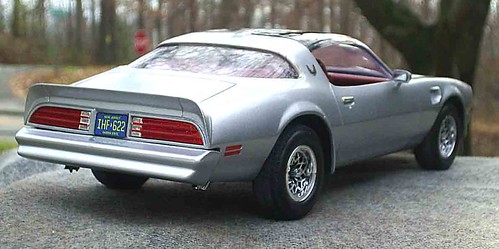
Final impressions: Despite the aged tooling of this kit, I was initially impressed by the quality of the fit and finish…that is, until I arrived at the final assembly and the rear bumper fit issue. However, overall this kit has a lot more positives than negatives, and I have no qualms whatsoever of giving it a strong 3 1/2 stars out of 5. The rear bumper issue is what really soured me from giving it a 4-star rating. If I built this kit again, I’d know exactly what to do in order to give it a 4-star accolade. Still, these issues shouldn’t discourage the modeler from building it…it’s actually a nice kit! Would I build it again? Sure! I did actually enjoy building it the first time, despite its issues, and would recommend it to any modeler, intermediate or advanced. I know my neighbors would be happy with the job I did trying to bring back memories of their 1:1 ’79 Trans Am, and I would love to get hold of a kit of a ’79 in order to do so. But until then, this kit will do just fine.
 Â
(Fig. #999)Â
Donations Humbly Accepted
 *All Registered trademarks are the property of their respective brands.
Â

