C-17A Globemaster III Revell #80-4674 Review

RoR Snapshot 20110528 – C-17A Globemaster III Revell #80-4674 Review
Review and Photos by Stephen Wilder  Â
Â
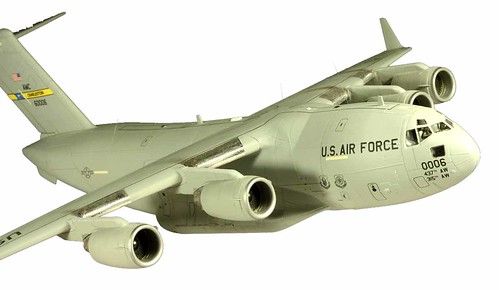
The current backbone of the United States Air Force’s airlift fleet, the C-17A Globemaster III is well represented in this 1/144 kit from Revell Germany. Its small scale is very deceptive, as the finished kit is actually as large as most 1/48 twin-engine jets, making this a rather substantial addition to one’s collection.
Â
The kit was initially released in 2008, and features recessed panel lines, a full interior, and options for raised or lowered landing gear. This first release (80-4044) includes decals for two USAF aircraft in the standard gray scheme, while a new release (80-4674) comes with decals for a gray Royal Air Force plane, as well as the unique gray-and-white Qatar Airways painted bird.Â
Â
I chose to build my Globemaster in flight, using kit decals to represent an aircraft from Charleston AFB. Construction began with the cargo hold interior. Although painting and displaying the interior is optional, assembling it is not – it makes up the structural core of the entire model. I added some N-scale model railroad figures to the cockpit to represent a flight crew, then assembled the outer fuselage halves, closed landing gear doors, and wings. I installed the clear parts and masked the window openings. The plane was then painted with RustOleum® plastic primer, followed up with airbrushed Folk Art® acrylics and a coat of Future®, in preparation for decals.
Â
The engines were assembled separately from the rest of the plane, using various metallic shades. The engine cowls and pylons were painted with the same process as the fuselage, and the completed engines, all four of them, were set aside for final assembly.
Â
I found the kit decals relatively easy to work with. The walkway border stripes were problematic, mostly due to their length, and some of the decals silvered slightly, even with the Future® and applications of Solvaset®. I also managed to apply one of the shield logos inside out – it floated from the backing and I didn’t realize the tiny lettering was backwards until long after I had completed the build. All things considered, the kit decals are sufficient, and unless one is building a bird not covered by the kit sheets, aftermarket decals are not necessary.

To finish my build, I finished the entire aircraft with a flat acrylic clear. I then added the engines, removed the window masks, added Bare Metal Foil® along the wing leading edges, and applied some subtle weathering with chalks. I solved the problem of displaying my finished C-17 by hanging it by 2 lb test fishing line, either from my home ceiling or a shepherd’s hook-shaped display stand. Â
Â
I enjoyed this build, and with the new decals and optional parts and poses, several of these attractive cargo haulers could easily make their way into my collection.
