’48 Ford Custom Coupe 1-25 Revell 85-4253 Review

RoR SnapShot Review 20111221* – ’48 Ford Custom Coupe 1-25 85-4253
Review
Click Here to Buy This Kit
Â
Review and Photos by Rich Clark 
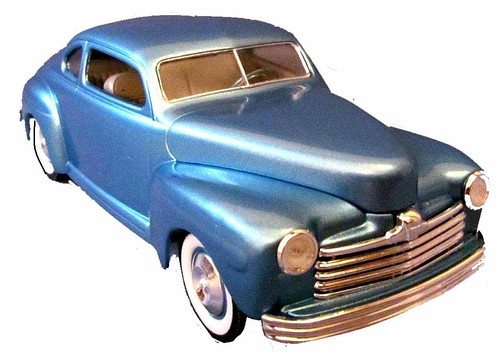
The 1948 Ford was the company’s last model to be produced using a pre-WWII design. Distinctive “fat” fenders helped make it an instant favorite with custom builders, who tended to chop the top and add fade-away fenders and tunneled headlights.

For the Modeler: – This kit features optional custom parts, four grilles with separate surrounds, two bumpers, two hubcaps, three taillights, two hoods, one with louvers and one stock. fade-away side panels, spotlights, fender skirts, metal exhaust tips, whitewall tires, chrome-plated parts and decals with colorful custom graphics.
Â

(Image 00001) The first thing I started to assemble on this kit, was the engine. As you can see in the photo, I have decided to add plug wires to give a little more detail to fairly detailed engine to begin with. In doing so, I drill a hole one both sides just above the placement mark where the distributor goes and ran the wires in between the block and the distributor and ran 4 wires to either side for the wires to be placed.

(Image 0002).Once the wires were in placed and the engine was built. This is the results we came up with. I feel these plug wires just added that nice touch

(Image 0003) After I painted the dashboard and added the chrome part of the dash in place, I went to add the instrument gauges (decals) in place. For some unknown reason the decals would not stick. Even after I removed the chrome where the gauges go and I even added warm detergent/water for the decals. So I have decided to add black accent to that area to give the dashboard the digital gauge look.

(Image 0004) The interior went together very well with absolutely no issues at all. Everything just fell in its place. When I went to place the interior onto the floor pan of the chassis, I did notice that the steering linkage was too long and it was holding up the interior from setting in place. I did have to cut off about a 2/16th of an inch of the linkage and the interior just settled in with ease (Image 004).

(Image 0005) While building the chassis (adding the front and rear suspension) everything went together very well until I went to add the rear shocks. The instructions show very poor views of where to properly place the rear shocks. You will find that the rear shocks are stubborn to get into place. With the odd location of where these shocks go, Revell would have been better off molding the shocks onto the rear axle to make assembly much easier. This may take you some time to figure out and may get a little frustrating, but you’ll figure it out, just take your time. Also, be sure to double check which suspension you want to use for your build. In the parts trees they give you two rear suspensions. One of them is listed in the instruction sheet and the other is not. It seems like Revell missed that part.
Other than these few minor issues that I have come across with this build, I really like how this went together.
On a more serious note, I believe Revell made the mistake in calling this kit a “3 n’ 1”. If this were a true 3n’1, this kit should have come with the stock roof and given the proper instructions on how to make this into the chop top version, if the builder chooses to do so. Just another note to add; when Revell did the ’49 Merc kit, the kit was given a second engine option with this ’48 Ford to give the builder more endless possibilities. If I were to rate this build (1 being the least and 10 being the best), I would have to rate this at “7”.

 Thanks,
Rich Clark
Donations Humbly Accepted
*All Registered trademarks are the property of their respective brands.
Â
