1940 Ford Custom Pickup Truck 1:24 85-4928 Review
RoR Step-by-Step Review 20120305* – 1940 Ford Custom Pickup Truck 1:24 85-4928 Review
Click Here to Buy This Kit
Â
Review and Photos by Marty and Stephanie Oberman 
For years the ’40 Ford has been a favorite of hot rodders and customizers in any and all body styles, and the pickup variation is no exception. This kit, although not a true 2n1 allowing the builder two distinct versions (stock or custom), there are enough components and options to satisfy the cravings of both types of builder.
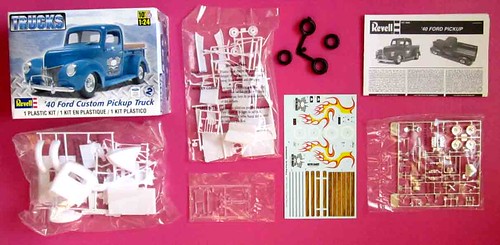
(Fig. #000a) The kit and its contents.
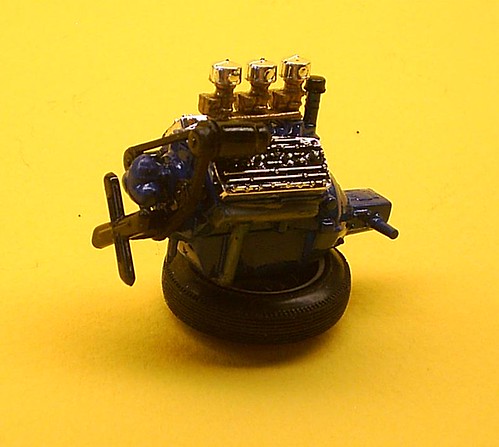
(Fig. #1) As usual I started with the engine, which frankly is dull and devoid of detail for the most part. The two-piece block/tranny contains the starter, front engine cover, cylinder heads, oil pan, exhaust manifolds and crossover pipe molded in. Of course, this is to be expected given the age of the tooling. However, every remaining component has been chrome plated: valve covers, intake manifold (with oil filler tube), triple carbs (with air cleaners), fan belt assembly, fan, and generator. Needless to say, as a stock builder I wasted no time in stripping the chrome from all but the valve covers, which received a blackwash to bring out the details. I did not strip the air cleaners of their chrome, and care must be taken when stripping the carbs so as not to accidentally strip the chrome from the air cleaners.
Â
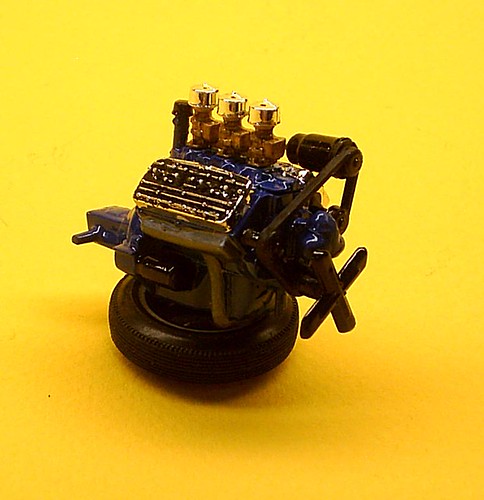
(Fig. #2) I glued the intake manifold to the block and painted the unit Dupli-Color Old Ford Engine Blue enamel, then painted the oil filler tube and starter gloss black, and the exhaust manifold/crossover pipe magnesium. The carbs were painted gold, and the generator, fan, and fan belt pulleys were painted gloss black. The belts were given a flat black treatment. Assembly was smooth, but the carb/intake mating was a bit tricky due to the lack of positive contact points. The completed engine looks reasonably acceptable.
Â

(Fig. #3) The chassis and suspension system is quite a simple affair, consisting of a chassis frame with front bumper brackets and molded-in single exhaust pipe/muffler, one-piece rear axle/driveshaft, front axle, two radius rods, and tie rod. I painted the frame semi-gloss black and detailed the exhaust pipe with a silver Sharpie, and the remaining components were painted gloss black. After mounting the finished engine onto the frame, the rear axle assembly slid right into place with little effort.
Â
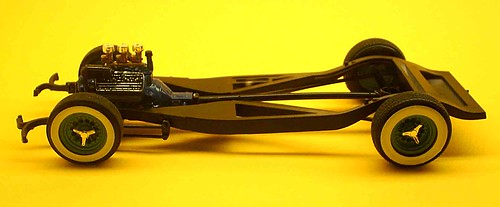
(Fig. #4) The front suspension assembly was a bit trickier; the front axle has a contact point on the frame, but it doesn’t guarantee a square and secure placement. The trailing edges of the radius rods, as well as the frame, have no definitive contact points for where they should mate to each other. The builder is left to guess where on the frame the radius rods attach. The tie rod installed with no problem, it was pretty much a no-brainer despite the lack of positive contact points.
The “big and little” tires and rims were a joy to install, and Revell even includes a set of whitewall decals for them, which scored major points for this modeler’s review. They were easy to apply, and for the most part went on and settled in nicely, and a brushing of Micro-Sol sealed the deal. The Centerline-type chrome rims with accompanying 3-spoke spinners are decent. However, I put my own personal “spin” on them by stripping the chrome from the rims, and painting them body color. The spinners were left chrome.
Â
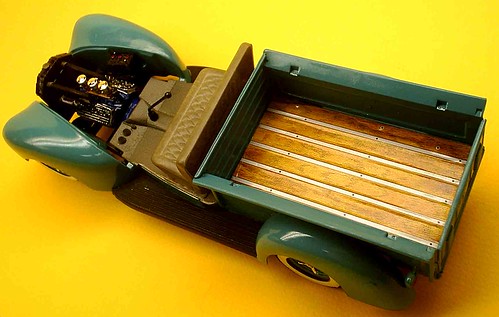
(Fig. #10) I installed the lower body/bed onto the chassis and the positive contact points made for a snug and secure fit. I also installed the interior floor pan, which contains shifter boot and pedals molded in. I then installed the bench seat and its support onto the interior floor. The floor, seat, and support were painted Dupli-Color “Vinyl and Fabric” medium gray. The chrome shifter was stripped, painted gloss black, and installed at the same time.
Â
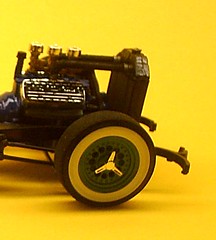
(Fig. #5, 7) The radiator consists of four parts: two chrome-plated top halves, and two bottom halves. The radiator hoses are chrome plated as well. I stripped the chrome from all and painted the radiator gloss black, with flat black core. The hoses were painted flat black with silver clamps. Installation of these items was issue-free, and the results are acceptable, although not really very detailed.
Â
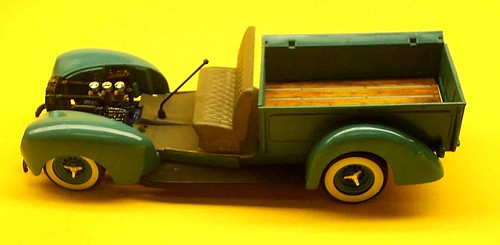
(Fig. #8) Next up was the bed side installation, which was a breeze since I began with the sides (on which I glued the taillights before painting body color (Dupli-Color Pontiac Engine Blue enamel) and later detailing the taillight lenses themselves with silver base and Tamiya clear red), continued with the front piece, and ended with the tailgate. Unfortunately the weak contact points for the tailgate not only prevented it from opening and closing, but also staying in place once installed. This forced me to simply glue the tailgate in place in the closed position.
Â
Â

(Fig. #10) Revell provides some sweet simulated wood decals for not only the bed (with chrome slats in-between the planks), but the optional side rails too. If the builder decides to paint the bed body color, separate silver slat decals are provided for such a setup. Nice touch! I went with the full bed decal which laid down perfectly, and after detail-painting the side rails Testor’s Earth Brown, applied the wood decals for them as well. They also installed without a hitch and look realistic.
Â
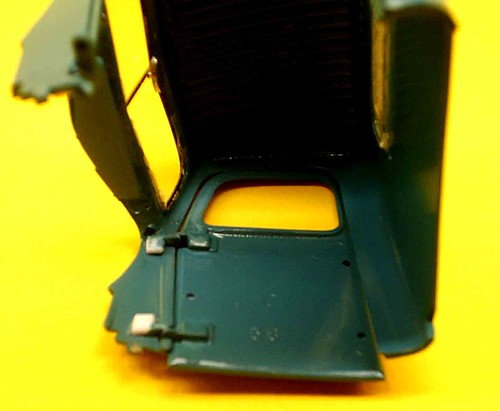
(Fig. #11) Working with the cab proved to be a challenge. The windshield and rear window installed without issue, and I took a black Sharpie around the windshield frame to simulate the rubber insulation. The rear view mirror was mounted onto the windshield before it was installed into the cab, due to the tight working space of the cab. The doors are two-piece; inner and outer. The window glass is trapped between the two pieces, and is allowed to move up and down due to graduated tapering grooves on the inside of the inner door panel. Trapping and gluing these pieces together proved to be tricky: my CA glue was too weak to keep the doors together since moving the glass up and down separated the door panels. I resorted to Super Glue and clamps to resolve this problem.
Â
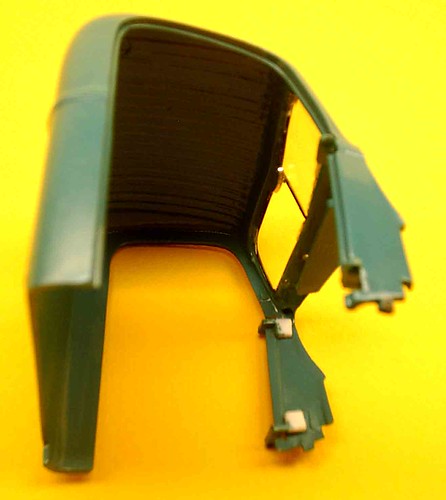
(Fig. #12) The hinges on the outer door panels have positive contact points; however, the corresponding points on the inside of the body shell do not. My mistake was gluing all hinges on without lining them up for a decent fit first. The driver’s side hinges are a bit tenuous as a result, and the door swings open more than 90 degrees, where the passenger side door stops short of that angle. My recommendation to the modeler would be to glue the hinges on the door, tape the door onto the body, then mate the partner hinges up to them before gluing into place for a smooth swing. The instructions tell the builder to join the two hinges together, but because they are “pin-and-hole” type hinges, this is physically impossible to perform. Despite my faux pas, and the poor design of the hinge system, the doors still manage to open and close with little effort.
Â

(Fig. #14) I then installed the firewall, hood hinge retainer, hood hinge, interior panels, and dashboard into the cab. The instructions show the steering column sliding through the hole on the bottom of the dashboard then poking through a hole in the firewall. Apparently this same hole is also meant for the beehive oil filter, which the instruction sheet shows having a pin on the backside of the filter. In actuality, the filter is hollow on the backside without any mounting pin. Inserting the steering column into the hole resulted in the column being askew and slanted, not straight. I moved the column’s end just to the right of the hole and glued it into place, ensuring the column would be square with the cab’s outline. The steering wheel then installed without issue.
Â
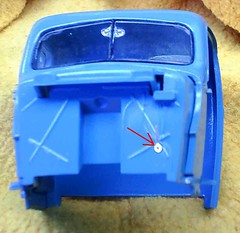
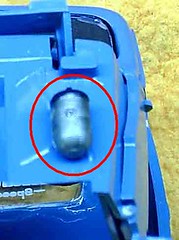
(Fig. #16, 20) I needed to find a solution for mounting the oil filter. I noticed that this kit came with a set of chrome plated tools such as wrenches, ratchet, pliers, and 4-way lug wrench. Since I was not planning to utilize these tools in the build, I sliced the ratchet in half, used the end where the sockets attach to plug the hole in the firewall, then gently pried the shaft outwards a bit. This allowed me to “hang” the oil filter off the protruding edge similar to one hanging a picture frame from a hook, and provide a secure mounting point as well. The result was excellent, and the ratchet is not visible.
Â
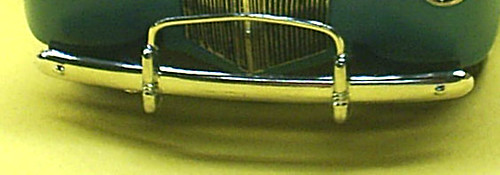
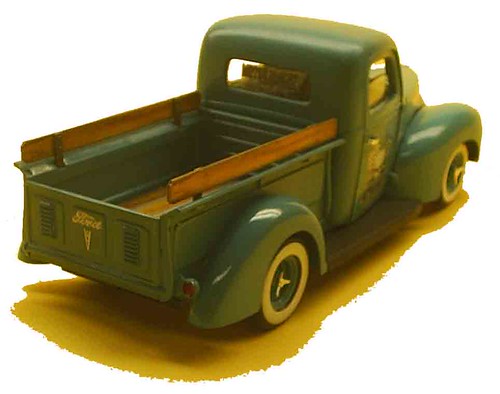
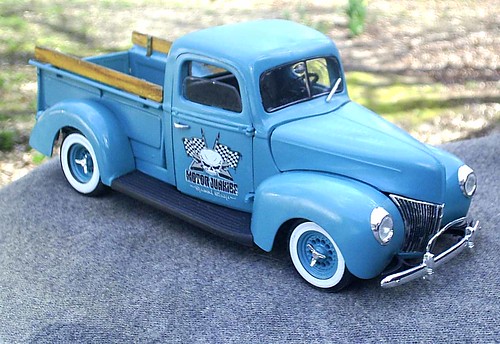
(Fig. #26a) I then installed the completed cab onto the body without difficulty, snapped the doors into the hinges, glued the gas cap, chrome grill, headlight bezels (after gluing the clear lenses in place), windshield wiper, door handles, side view mirror, and front bumper into place. All installed without issue save for the front bumper. The mounting holes in the bumper supports did not line up with the pins on the bumper, and I was forced to slice the pins off the inside of the bumper and Super Glue it to the supports. The side bed rails installed without any problem, and the final application was the “Motor Junkies” decals on the doors and rear window. My whole intent for this project was to build a “low budget” restoration of a daily-driven shop truck, with a quick “Maaco” type paint job that doesn’t shine too awful well. Hopefully I’ve succeeded to replicate that look.
Â
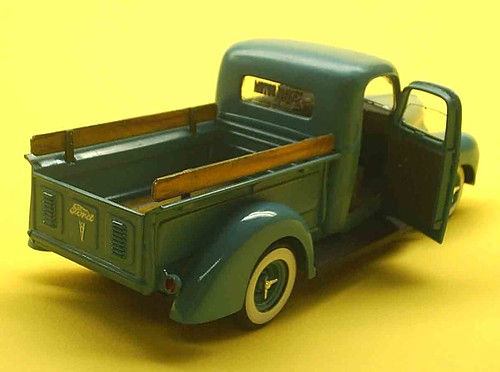
(Fig. #25) Final impressions: this kit started out well, but unfortunately the deeper I got into it, the more problems with fit and design I encountered. It seems like it was almost rushed to market, and design, engineering, and fit were not much of a priority. Although the kit builds into a decent looking model, and flash on parts is a non-issue, I would not recommend it for a beginning modeler. In fact, I’ve been told by a few experienced modelers that they were so frustrated by the door hinge system they simply glued the doors shut. I can’t blame them, in fact I came close to doing so myself during the build. As a result, I can only give this kit a 2 1/2 star rating. Half the kit went together well, the other half did not. Would I build this kit again? Most likely not, despite some redeeming qualities of its overall look. Plus, I’m not much into customs to begin with anyway. ;c)
Â
Â
Â
*All Registered trademarks are the property of their respective brands.
Â
Â
Â
Â
Â
Â
Â

