UH-1D Huey Gunship 1:32 Scale Revell Model Kit #85-5536 Review

2015 November 30
by Doug

Right On Replicas, LLC Step-by-Step Review 20151130*
UH-1D Huey Gunship 1:32 Scale Revell Model Kit #85-5536 Review
000

Review and Photos by James Yeager James Yaeger II Thumbnail

The Huey was ordered for the U.S. Military in 1952. The Huey was the first turbine powered helicopter in production. It was designed to be a medical and a utility helicopter for the military. The Huey saw extensive usage during the Vietnam War. The most known of these missions were the ones flown by Major Bruce Crandall who flew 14 (Revell Box info) or 22 (internet sources) forays during the Battle of IA Drang. Major Crandall was the commander of A Company 229th Aviation Battalion in 1965. During this time Major Crandall flew an unarmed Huey bringing supplies and evacuating the wounded. Major Crandall flew over 900 combat missions during the Vietnam War.

For the modeler: This is the UH-1D Huey Gunship 1:32 Scale Monogram Model Kit #85-5536 Review.  Revell released this kit before with several variations (earliest 1967) and now Revell brings it back in 2012. I have found ten other versions of the 1:32 Huey, two 000b 
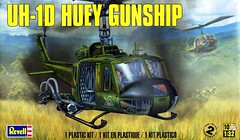
of which are civilian police versions. The ten versions I found and the approximate year they were released are; Revell H-286 Bell UH-1D Huey Helicopter (1967), H- 259 Bell Huey Attack Helicopter (1968), H-274 Police Helicopter (1978), Kit number unknown Bell UH-1D Hubschrauber der heeresfliegertruppe (197?), M4 Bell UH-1D Police Helicopter (Japanese issue, 1980), 4421 Bell UH-1H Gunship (1982, 1994), 4440 Bell UH-1D (1985), 4454 Helicopter Patrol (1985), 4422 Bell UH-1D UN (1995).This kit’s pieces are molded in olive drab, and clear, with sticker decals. There are 139 pieces to this kit and very well laid out instructions. The dimensions are; (with main rotor going sideways and tail rotor going up and down) L -15 ¾”, W -17-7/8”, & H -5 3/8, with main rotor following fuselage and tail rotor going up and down and the machine guns on the side 20 1/8 L X 5 3/8 W X 5 3/8 H, with the main rotor following the fuselage as well as the tail rotor and the machine guns 21 ¼ L X 5 3/8 W 5 1/8 H.

Covered in this Review:  If you want to perfect your build; basic construction; part preparation; decal preparation and application; flash and parting line seam identification and repair; adhesive selection and applications; cockpit construction and detailing; machine gun and rocket pod finishing; detailing the ammo belts; hub and rotor construction and finishing; using metalizers to detail the engine and transmission; where NOT to use glue for operational parts; using clear glue for windows; alternate assembly sequence for fit and finish; patching sink marks in the figures; detailing the figures; missile paint selections; decal selection; doors open displays, are all fully examined in this pictorial 27 page, full-color Step-by-Step review in PDF format.  The kit instructions are also available with this review.


100% money back guarantee!

Click the Buy Now link below to purchase the full Step-by-Step review for $2.95 USD.


Important – You MUST click on the “Return to Right on Replicas, LLC” link after you’ve made your purchase to download your review!


Right On Replicas, LLC ©2015 All rights reserved. *All registered trademarks are the property of their respective brands. Follow the manufacturer’s safety recommendations for any product mentioned here.

Kenworth W-900 Aerodyne Conventional 1:16 Scale Monogram Model Kit #85-2508 Review

2015 November 23
by Doug

Right On Replicas, LLC Step-by-Step Review 20151123*
Kenworth W-900 Aerodyne Conventional 1:16 Scale Monogram Model Kit #85-2508 Review
000

Review and Photos by Alan Mann Alan Mann (Thumbnail)

The W900 is a Class 8 truck known for its long-nose style. Even as more aerodynamic models such as the T600 and succeeding versions were introduced for fleet use, the stylish W900 remains in production due to its particular popularity with owner-operators. The W900 was a gradual introduction, retaining many features of its predecessors which also continued to be sold alongside it in the early 1960s. The W900 is still in production after over fifty years, although not much remains unaltered. The original truck had a split, flat pane windshield which is still available in certain versions, although since December 1994 the T600’s cab using a curved windscreen was added to the lineup. When buying a Kenworth Aerodyne, you chose from a long list of options to customize your ride into something that really reflects your personal style. In all cases, the final result was a quality truck backed by the 80 year history of Kenworth/PACCAR craftsmanship. The W-900 truck model was powered by an epic 450 horsepower, 1099 cid engine that delivered the power you needed for long hauls across America.

For the modeler: This review covers the Re-release (Re-Pop) of the Kenworth W900 Aerodyne Conventional tractor by Revell under the Monogram name. The kit is a larger 1/16 scale with plenty of detail. This is Kit #2508 in the current catalog. There have been 1 previous releases of this kit in multiple box arts but the parts have remained the same. This is a Skill Level 3 for advanced builders aged 12 and up. There are 278 parts molded in Blue, Black, Chrome and Clear and includes Vinyl tires and Waterslide decals. The instruction sheet is typical of the Revell Book style and is easy to follow. The build starts with the chassis and is nicely detailed. Most of the chassis can be assembled prior to painting. The motor is fairly detailed but has a low parts count. Chrome is bright and crisp. The interior is highly detailed but lacks decals for the dash. The cab is a single part with a multiple part sleeper. Painting as a built unit is impossible due to glass in the sleeper roof. Assembly is straight forward but can be tedious with the chrome being glued to the painted surfaces. Work carefully to build a quality finished kit. Overall dimensions are: Length: 20″, Width: 6”, Height: 8-3/8″.

Covered in this Review:  If you want to perfect your build; basic construction; preparing parts for better finishing; alternate assembly sequence suggestions for fit and ease of finishing; abrasive choices; complete paint and adhesive selections and applications; test fitting; repairing flash; mold seam identification and repair; using white glue for the window glass; suspension construction; brake drum and air bag construction; fifth wheel detailing; shock and torsion bar placement; detailing the tires for realism; chassis construction and detailing; driveshaft identification; detailing the trim with foil; removing copyright script; engine construction and detailing; fuel tank notes; interior detailing; contest model considerations; correcting instruction errors; installing the license plates properly; tire orientation; duallie installation; detailing the turn signals and roof lights; creating tinted windows; sleeper notes; adding blackwash detailing to the grill; detailing the dashboard; modifications and correction for the hood fit; mounting the fuel tanks; combining instruction steps into sub-assemblies for better finishing; undocumented parts; using floor wax to make crystal clear window glass; decal preparation and application; using decal setting solutions for that “painted on” look; are all fully examined in this extensive 29 page, full-color Step-by-Step review in PDF format.


100% money back guarantee!

Click the Buy Now link below to purchase the full Step-by-Step review for $4.95 USD.


Important – You MUST click on the “Return to Right on Replicas, LLC” link after you’ve made your purchase to download your review!


Right On Replicas, LLC ©2015 All rights reserved. *All registered trademarks are the property of their respective brands. Follow the manufacturer’s safety recommendations for any product mentioned here.

William Ray’s Shake-N-Paint Review

2015 November 12
by Doug

Right On Replicas, LLC ToolRev Review 20151112*
William Ray’s Shake-N-Paint Review
Paint Shaker (1)


Review and Photos by Alan Mann Builders Thumbnail  Alan Mann (Thumbnail)

While we normally do model kit reviews here, every now-and-then a new product comes along that just grabs our attention.  Knowing that we hobbyists all use paint for our builds and that we’ve all had issues with mixing the bottle paint thoroughly.   Sometimes paint just sits for a while and gets separated and you need to sit and mix it forever losing half of it to the mixing stick.  Even for normal use you need thoroughly mixed paint for proper coverage.  I ran across an item that solves that problem on a Facebook group and contacted the manufacturer of the Shake-N-Paint; William Ray.
Paint Shaker (2)
PIC 2  This is the Jigsaw Version Shake-N-Paint. It is a 3D printed product that is custom made by William Ray and sold directly by him either from E-Bay or Facebook: This is a simple to use fixture that connects directly to your Jigsaw. Within less than 5 minutes work you can mount the unit and shake your paint like a pro. There is a quick demo video for you to see here. DEMO

Paint Shaker (3)    Paint Shaker (4)

PIC 3     PIC 4  I left this bottle of Tamiya Gun Metal untouched until it was completely separated. Mounting the bottle in the mixer I used the shaker for about a minute.

Paint Shaker (5)
PIC 5  The results were a perfectly mixed bottle of paint that is smoothed out and ready to use. When you paint, you can tell the difference if it’s well mixed because coverage is much better.

.   Paint Shaker (7)
PIC 6     PIC 7  To really put the Shake-N-Paint to the test I dug a bottle of discarded paint out of the trash.  It had sat for six months unused and subsequently settled and dried to almost a rubbery solid.  I added a couple drops of thinner to the bottle and started up the Shake-N-Paint for a minute.  When I opened it up there was fully reconstituted turn signal amber waiting to be used.  ***NOTE*** Use caution when using this product.  Carefully follow the manufacturer’s directions for use and make sure the lid on your paint is tight.

Paint Shaker (8)
PIC 8  At this time there is also a mixer available for Tamiya paints that also happens to hold the Vallejo bottles and another unit that will hold the Testors square and Model Master paints. Future plans to make mixers for additional brands are also in the works.

Overall: this is a great product for the price and highly recommended for your tool kit! There is also a version that you can use with your Sabre Saw.   Contact Mr. Ray and tell him you heard about him from us  because this paint shaker is “Right-on!”


Right On Replicas, LLC ©2015 All rights reserved. *All registered trademarks are the property of their respective brands. Follow the manufacturer’s safety recommendations for any product mentioned here.