Bad Company 1982 Dodge Van 1:25 Scale MPC Model Kit #824 Review

2015 October 9
by Doug

Right On Replicas, LLC Step-by-Step Review 20151009*
Bad Company 1982 Dodge Van 1:25 Scale MPC Model Kit #824 Review
000

Review and Photos by Alan Mann Alan Mann (Thumbnail)

The B-Series is a full-size van that was built by Dodge starting in 1971. In 1979 the van received a redesigned front end, including a new grille with wraparound turn signals. Lower-end models had single round headlights, while the Royal Sportsman and other high-end vans received four rectangular headlights. The van would keep this body style and the 1978 dash intact with only grille changes all the way through the 1993 model year. In 1981 the B-Series was rebadged as the Dodge Ram Van; the passenger variant was known as the Dodge Ram Wagon. The body shell and most fixtures would be one of the longest running of any US vehicle, remaining nearly identical from the vans’ introduction in 1971 through their discontinuance in 2003, while Ford and GM would go through two or three generations of platform redesigns. DaimlerChrysler discontinued production of the Ram Van and Ram Wagon after more than 30 years of production following the 2003 model year, replacing them with the Dodge Sprinter.


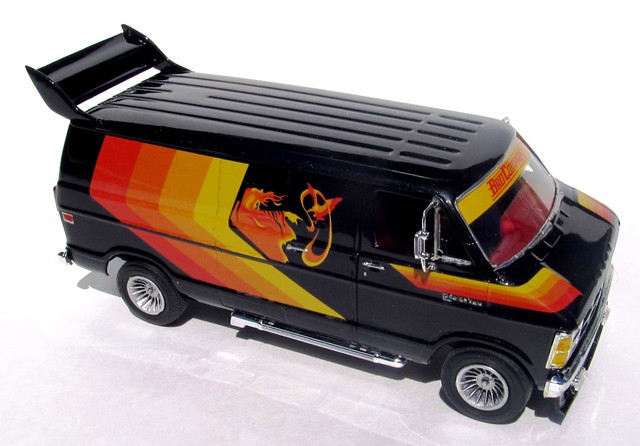
For the Modeler: This review covers the re-release (Re-Pop) of the MPC Bad Company van by Round2. This is kit #MPC824 in the current catalog and is in 1/25 scale. This kit has seen multiple releases over the years and Round2 has returned this release to the 1 
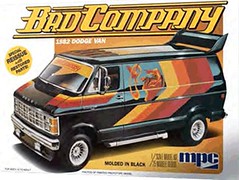
original version from 1982 with all its stock and custom parts. Round2 rates this as a Skill Level 2 for moderate ability builders. You get 95 parts molded in White, Chrome, Clear and Clear Red with Vinyl tires and Metal axles. The decals are new reproductions of the originals. The instructions are laid out in nine easy-to-follow steps that show both Stock and Custom build options. The motor is a fairly detailed build but there is no purpose for excess details or wiring as it will not show in the built kit. The chassis is simplified with a separate frame but basic suspension. The interior has some custom parts but to see them you must cut out the roof. A clear panel is supplied if you wish to do so. The body is straight and represents a long body van that can be stock or custom as it has no custom windows or accessories pre-cut on the body. Overall dimensions are: Length: 7-1/2” Width: 3”, Height: 3”.


Covered in this Review: If you want to perfect your build; basic construction; preparing parts for better finishing; alternate assembly sequence suggestions for fit and ease of finishing; complete paint and adhesive selections and applications; using optional gauges from online sources; test fitting; highlighting the dashboard; interior color scheme; front suspension build sequence; dashboard detailing; stock vs. custom version considerations; flocking the carpet for optional interior realism; how to detail the turn signal lenses; using “clear” glue for window glass installation; passenger area detailing; frame detailing with a gel pen; front/rear tire Installation; mold seam identification and repair; enhancing the grill with black wash; chassis installation; a hassle free chassis to body installation technique; using Alclad paint to make the tire rims look real; using decal setting solutions for that “painted on” look; window trim detailing with foil; making realistic looking tires; a ‘crystal clear’ window glass treatment; complete engine construction and finishing; suspension construction and detailing; are all fully examined in this 15 page, full-color Step-by-Step review in PDF format.


100% money back guarantee!

Click the Buy Now link below to purchase the full Step-by-Step review for $2.95 USD.


Important – You MUST click on the “Return to Right on Replicas, LLC” link after you’ve made your purchase to download your review!


Right On Replicas, LLC ©2015 All rights reserved. *All registered trademarks are the property of their respective brands. Follow the manufacturer’s safety recommendations for any product mentioned here.

The Joker Monster Truck 1:32 Scale AMT Model Kit #941 Review

2015 October 7
by Doug

Right On Replicas, LLC Step-by-Step Review 20151007*
The Joker Monster Truck 1:32 Scale AMT Model Kit #941 Review
000

Review and Photos by Alan Mann Alan Mann (Thumbnail)

Don’t make us laugh! The green hair; the crazed smile; the maniacal cackle; you know exactly who he is and how far he’d go to put a smile on your face. The Joker stands unquestionably as the most recognizable and popular comic book villain in pop culture history. Unpredictable, violent and incredibly dangerous, he is chaos personified and has taken on everyone from his archenemy Batman to even the Man of Steel. Since his beginning in1940 in Batman #1 the Joker has been a constant in many of the Batman storylines.

AMT’s Ford “The Joker” Monster Truck is all about fun in model building. The base of this kit is the Bigfoot Monster Truck. This easy to assemble kit is molded in three colors so no painting is required. The snap-together parts let young or inexperienced hobbyists build a great looking model in a short time. The kit includes a full-color DC Comics Joker sticker sheet to add the finishing touch!


For the Modeler: This review covers the Round2 release of the 1/32 scale The Joker Monster Truck from AMT. The kit is number AMT-941 in the current catalog. This is a Re-release (Re-Pop) of the popular Bigfoot Monster Truck in new colors with specific AMT941 Joker Monster Truck Lid stickers for the DC Comics brand. This kit is also available in multiple versions with other designs. This is a “SNAP-IT” kit made as Skill Level 1 for the Beginning Builder. It is molded in three colors and will need no paint or glue to assemble. There are 25 parts molded in Green, Purple and Black. It includes Vinyl tires and Metal axles. No engine or interior is supplied. The chassis is a flat base with the frame work as an attachment. The body is solid with only the bumpers and light bar separate. The tires are hollow and can be mounted all in the proper direction. It does not have Water-slide decals as this is a beginner’s kit the graphics are STICKERS. This would be considered a CURBSIDE kit. Overall the dimensions are: Length: 7”, Width: 4-3/4”, Height: 4”.


Covered in this Review: If you want to perfect your build; basic construction; preparing parts for better finishing; test fitting; chassis construction and detailing; mounting the body to the chassis; applying sticker graphics; tire/wheel assembly; directional tire considerations; making the grill look real with a “black wash”; building and installing the frame; adding the light bar and roll pan; axle assembly sequence for fit; chassis/frame alignment; are all fully examined in this 8 page, full-color Step-by-Step review in PDF format.


100% money back guarantee!

Click the Buy Now link below to purchase the full Step-by-Step review for $2.95 USD.


Important – You MUST click on the “Return to Right on Replicas, LLC” link after you’ve made your purchase to download your review!


Right On Replicas, LLC ©2015 All rights reserved. *All registered trademarks are the property of their respective brands. Follow the manufacturer’s safety recommendations for any product mentioned here.

Messerschmitt Me-262 A-1a 1:48 Scale Revell Model Kit #85-5322 Review

2015 October 5
by Doug

Right On Replicas, LLC Step-by-Step Review 20151005*
Messerschmitt Me-262 A-1a 1:48 Scale Revell Model Kit #85-5322 Review
000

Review and Photos by Kevin Lawton Kevin Lawton Thumbnail

The Messerschmitt Me-262 is well known by many as the world’s first operational jet fighter. Development was started before the beginning of World War II as an outgrowth of the successful test flights of the world’s first jet aircraft—the Heinkel He 178. Within a week of the Invasion of Poland the Luftwaffe adopted the jet engine for an advanced fighter aircraft. The first flight of the new aircraft took place on April 18th 1941. However, the intended Jumo 003 jet engines, were not ready so the first flights were made using modified Junkers Jumo 210 piston engine mounted in the nose and driving a 3-bladed prop. When the 003 engines were finally installed, the Jumo 210 and prop were retained for safety reasons. This proved to be a good idea as both 003s failed during the first flight and the pilot had to land using the nose-mounted engine alone. The Me-262 had a top speed of 559 mph and a service ceiling of 37,565 ft. It was armed with 4 30 mm MK 108 cannon, the aircraft could also carry 24 55mm unguided air-to-air rockets, and 2 550lb bombs. By removing two of the 30mm cannon and their associated ammunition, the airframe could carry 2 1,100lb bombs (Me-262 A-2a variant). In the end, the Me 262 had a negligible impact on the course of the war as a result of its late introduction and the consequently small numbers put in operational service.


For the Modeler: This review covers the Messerschmitt Me-262 A-1a 1:48 Scale Revell Model Kit #85-5322. Revell rates this a Skill Level 2 kit for the intermediate builder. It consists of 96 parts molded in Light Gray plastic six clear plastic parts. The clear 000b parts are very clear with no significant imperfections and no ‘cloudiness’. The instructions are generally pretty good but there are some issues that are cleared up in the review. This kit features; a front gun access panel and four 30mm cannons, a detailed engine and two external bombs, standing pilot and crew figures, waterslide decals, and illustrated instructions. One of the marking and painting options in the Revell kit is the Me-262 that major Nowotny was flying Nov. 8th, 1944 – it is that aircraft that I used for this build. The completed dimensions are: •Length: 7-5/16″, Width: 2-7/8″, Height: 2¼”.


Covered in this Review: If you want to perfect your build; basic construction; preparing parts for better finishing; extensive paint and finishing information; adhesive selections and applications; cockpit construction and detailing; decal preparation and application; cockpit and instrument panel detailing; nose weight consideration and implementation; using clear coats for decal application; landing gear and tire finishing; identification of the copyright script; extended historical information; interior panel finishing; clamping methods; complete crew figure painting information; canopy masking and detailing; camouflage masking and painting; decal selection, preparation, and application, and repairs; instruction errors explained; detailing the landing gear bays; instruction contact point clarifications; making a homemade C/A applicator; removing and repairing the prop rod hole; using setting solutions for great looking decals; over-coating with clear flat spray; underside construction sequence; scratch building pitot tubes, prop rods and cable stays; antennae rigging; filling and repairing gaps and seams; how to handle ejector pin marks; how to open up the hatches and bays for realism; and added detail; detailing the jet engines; avoiding the tail sitter syndrome; masking methods explained; armament detailing; extensive landing gear construction and detailing; are all fully examined in this extensive 30 page, full-color Step-by-Step review.


100% money back guarantee!

Click the Buy Now link below to purchase the full Step-by-Step review for $3.95 USD.


Important – You MUST click on the “Return to Right on Replicas, LLC” link after you’ve made your purchase to download your review!


Right On Replicas, LLC ©2015 All rights reserved. *All registered trademarks are the property of their respective brands. Follow the manufacturer’s safety recommendations for any product mentioned here.