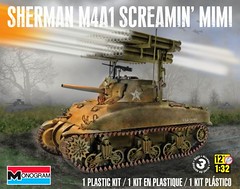
Sherman M4A1 Screamin’ Mimi 1:32 Scale Monogram Model Kit #85-7863 Review

2015 August 27
by Doug

Right On Replicas, LLC Step-by-Step Review 20150827*
Sherman M4A1 Screamin’ Mimi 1:32 Scale Monogram Model Kit #85-7863 Review
000

Review and Photos by James Yeager James Yaeger II Thumbnail

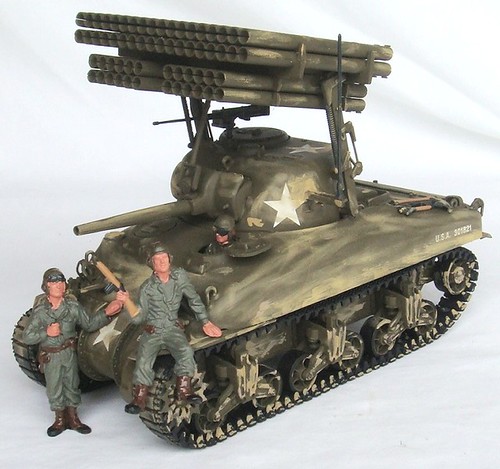
The Sherman Tank was used during World War II and was in every theater of that war. The Sherman had less armor than most tanks on the battle field however made up for this by being “fast, reliable and easier to repair”. The turret mounted T34 was called a “Calliope” rocket launcher and had the ability to be fired in sequence or all at the same time. In case of an emergency with a push of a button the launcher was able to be jettisoned off the turret. There were around 50,000 Sherman tanks in different variations were produced during World War II. With that number of Sherman tanks produced they were able to overwhelm the enemy.


For the Modeler: This is the Monogram Sherman M4A1 Screamin’ Mimi Tank kit #85-7863. It is 1:32 scale, and a Skill Level 3. Monogram has released other versions this kit before (1975) and now Revell brings it back in 2015 under the Monogram name. I have found five 000b other versions of the 1:32 Sherman Tank, three of which are the Screamin’ Mimi version; Monogram 4200 (1975), Monogram 6500 (1983), Monogram 7863 (2015), the other two versions are the Hedge Hog Version; Monogram 4201 (1975) and Revell 7851 (2011 or 2012).The pieces are molded in olive drab with black vinyl tracks and waterslide decals. There are 133 pieces to this kit and very well laid out instructions. The dimensions are; 7¼” L X 3-3/16” W X 5¼” H for the Screamin’ Mimi version.
 

Covered in this Review: If you want to perfect your build; basic construction; preparing parts for better finishing; alternate assembly sequence suggestions for fit and ease of finishing; complete paint and adhesive selections and applications; test fitting; checking for broken details; removing unwanted copyright script; complete road wheel and suspension construction; instruction errors explained; detailed calliope rocket launcher construction and finishing; color scheme for the crew figures; peripheral gear color choices; version considerations; where “not” to use glue, idler wheel assembly sequence; bogey wheel assembly tool and method explained; crew figure painting scheme; turret and gun assembly; how to connect the track pieces together; flash and sink identification and repair; turret and hull assembly; decal preparation and application; dullcoat and weathering sources and techniques; are all fully examined in this 26 page, full-color Step-by-Step review in PDF format.


100% money back guarantee!

Click the Buy Now link below to purchase the full Step-by-Step review for $3.95 USD.


Important – You MUST click on the “Return to Right on Replicas, LLC” link after you’ve made your purchase to download your review!


Right On Replicas, LLC ©2015 All rights reserved. *All registered trademarks are the property of their respective brands. Follow the manufacturer’s safety recommendations for any product mentioned here.

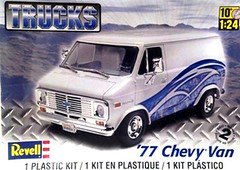
1977 Chevy Van (Custom Coroner Decals) 1:24 Scale Monogram Model Kit #85-7221 Review

2015 August 26
by Doug

Right On Replicas, LLC Step-by-Step Review 20150826*
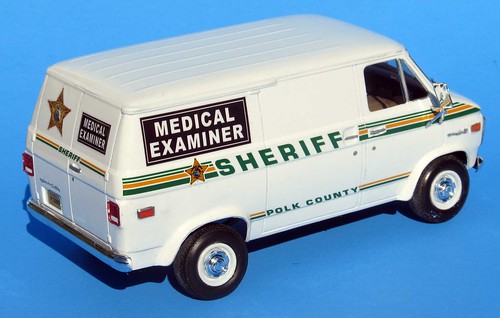
1977 Chevy Van (Custom Coroner Decals) 1:24 Scale Monogram Model Kit #85-7221 Review
000

Review and Photos by Alan Mann Alan Mann (Thumbnail)

The Chevy Van refers to the Chevrolet G-Series vans which are half-ton Cargo Vehicles produced by General Motors. GM saw a market for a compact van based on a modified passenger car platform to compete with the already successful Ford Econoline and Dodge A100. The early Chevy Vans had a cab forward design where the engine was placed in a “doghouse” between and behind the front seats. The implementation of situating the driver on top of the front axle with the engine near the front wheels is called a “cab over” vehicle. In 1971, Chevy Vans received a major redesign, moving the engine forward of the driver with a short nose and hood. The van was constructed of a unibody style frame and employed stronger truck style hubs and brakes with dual A-Arm independent front suspension. The major restyle followed the engine-forward design of the competing 1968 Ford Econoline. Suspension and steering parts came from the Chevrolet/GMC C-series pickup trucks.


For the modeler: This review covers the Revell re-release (Re-Pop) of the 1977 Chevrolet Van. This is Kit #85-7221 in the current catalog. The kit was released under the Monogram name in 1977 and has seen multiple box arts including a race car trailer combo kit 000B in the 90’s. Revell rates this as a Skill Level 2 for Moderate Builders. There are 81 parts molded in White, Chrome, Clear and it has Vinyl tires. The motor is a bit simplified but as it is not seen once the model is done there is no loss. The interior only consists of a basic front tub and custom seats and a dash. The “doghouse” is molded in to the floor. There is no rear floor or interior at all but as there are no windows it is not too important. The body is solid molded with no windows nor opening doors or hood. While mostly stock it has flares on the wheel wells molded on. The chassis is simplified and the frame is molded to the floor. The kit decals are custom stripes or a generic plumbing company. Just like the real things a van can be used for many things including the business of the County Coroner. With a little research and an ink jet printer – you can make this kit into just about anything you like! The instruction sheet is typical of the Revell “book” style they are currently using. Overall dimensions are: Length: 7-5/16″, Width: 4″, Height: 3-1/4″.


Covered in this Review: If you want to perfect your build; basic construction; preparing parts for better finishing; alternate assembly sequence suggestions for fit and ease of finishing; abrasive choices; complete paint and adhesive selections and applications; test fitting using white glue for the window glass; complete suspension construction; detailing the tires for realism; body seam identification and removal; complete painting instructions; chassis construction and detailing; mounting the body to the chassis; removing copyright script; engine construction and detailing; complete building and interior detailing; detailing the headlights and taillights; detailing the dashboard; optional foil and trim instructions; version considerations; using floor polish to make “crystal clear” window glass; turn signal finishing; sources for making your own decals; using parts box pieces for authenticity; installing the glass with clear glue; using decal setting solutions for that “painted on” look; combining instruction steps for better finishing; decal preparation and application; are all fully examined in this 15 page, full-color Step-by-Step review in PDF format.


100% money back guarantee!

Click the Buy Now link below to purchase the full Step-by-Step review for $2.95 USD.


Important – You MUST click on the “Return to Right on Replicas, LLC” link after you’ve made your purchase to download your review!


Right On Replicas, LLC ©2015 All rights reserved. *All registered trademarks are the property of their respective brands. Follow the manufacturer’s safety recommendations for any product mentioned here.

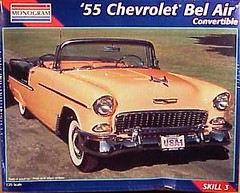
1955 Chevy Bel Air Convertible 1:25 Scale Monogram Model Kit #85-2462 Review

2015 August 25
by Doug

Right On Replicas, LLC SnapShot Review 20150825*
1955 Chevy Bel Air Convertible 1:25 Scale Monogram Model Kit #2462 Review
000a

Review and Photos by Mark Silver Mark Silver

For 1955, Chevrolet’s full-size model received all new styling and power. It was called the “Hot One” in GM’s advertising campaign. Chevrolet’s styling was crisp, clean and incorporated a Ferrari-inspired grille. Bel Airs came with features found on cars in the lower models ranges plus interior carpet, chrome headliner bands on hardtops, chrome spears on front fenders, stainless steel window moldings, full wheel covers and an available V-8 engine.

Fun Fact: This was not the first Chevrolet to be installed with a V8 engine. The first Chevrolet with a V8 engine was introduced in 1917 called the Series D which was built for two years, and was manufactured before Chevrolet joined General Motors. The original cost of a 1955 Chevrolet Bel Air was $2,305.00.


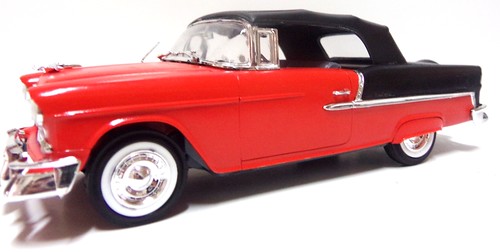
FOR THE MODELER: This SnapShot review covers the Monogram 1:25 scale 1955 Chevy Bel Air Convertible plastic model kit #2462. This kit has seen three re-releases. The last issue was 2013 but you can still find them online at retailers and auction sites. The skill level 000b listed for this model is level 3 for the intermediate to advanced modelers. The kit contains 137 parts, molded in white, chrome, clear and red. This kit contains lots of detail, from the motor, to the interior. All the chrome accents the model nicely. Metal foil can be used around the window trim, however you can use silver paint if you don’t use foil. The tires were a soft rubber, Continental tire mount, fender skirts, top can be up or down. Decals came with both stock and colorful custom graphics. The instruction sheet was several pages and very well detailed. This is a difficult kit with all of the small pieces. The overall dimensions of the model are length 8 -1/4″, Width 3″, Height 3″.

Construction begins with the motor, painting is done in different colors, which makes it hard to handle and must be painted in several stages and left to dry. For the ease of painting at all stages of the model, paint and let dry prior to building. Next is the suspension 002 which was fairly simple. For the rubber tires, nothing was needed except assembly. The interior came with lots of detail and painting. Assemble the sides first then install the seats once all detail and paint are complete. As for the body this should be done in stages, painting your lighter color first. Since the accent is a darker color, after the first color (the lighter color) is dry, you must mask off the model then add the second color. Final assembly adds the chrome pieces along with the front and rear bumpers. Decals can be added for your choice of stock or custom that comes with the kit. For best results; use quality paint and an airbrush, paint all parts prior to building. Remove all the flash from the parts. Wet sand the body with a 1200 grit, primer then use a good masking tape to cover areas for tutones. Finally, just paint and clear coat.


OVERALL: Monogram always delivers a good and detail kit. For the older builders it lets them look into the past and all of the memories, and for the younger builder, it can show them how far car technology has come. The overall fit of the parts was good, some had flash and had to be trimmed, and there is lots of painting in small details. As for the body I recommend doing it in stages, as it is a two color paint scheme, and masking off the areas is a must. You can add metal foil to the trim or paint. Be careful on the assembly of the front and rear bumpers, There is not much for it to attach to the chassis. The assembly on this model is not fast and can take some time to complete. The finished build is one you can display and even enter into a show.


Right On Replicas, LLC ©2015 All rights reserved. *All registered trademarks are the property of their respective brands. Follow the manufacturer’s safety recommendations for any product mentioned here.