1959 Cadillac Eldorado Hardtop 1:25 Scale Revell Model Kit #85-4361 Review

2015 June 8
by Doug

Right On Replicas, LLC Step-by-Step Review 20150608*
1959 Cadillac Eldorado Hardtop 1:25 Scale Revell Model Kit #85-4361Review
000

Review and Photos by James Yeager James Yaeger II Thumbnail

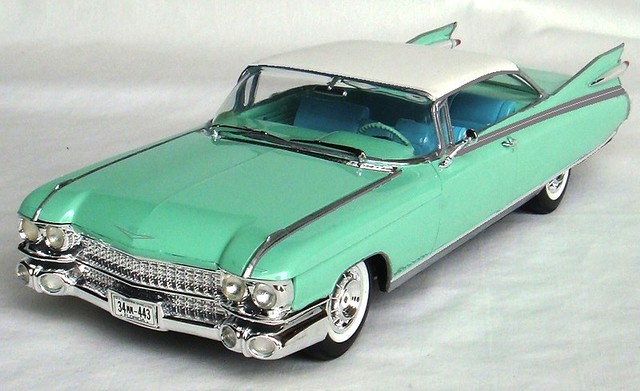
 With the dawn of the space age the styling cues in Detroit took to the skies for inspiration and nowhere else was it personified more elegantly than in the 1959 Cadillac Eldorado. Of the hardtop Eldorado versions, only about 975 of the actual cars were produced making it a very collectable car It is said that the 1959 Cadillac “had the biggest tailfins of any car before or since” and that seems very true.


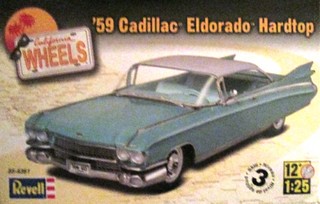
For the Modeler: This review covers the Revell California Wheels series kit 85-4361 1959 Cadillac Eldorado Hardtop in 1:25 scale. This is a Skill Level 3 kit for modelers 12 and above. Revell released this kit before in 1985 (the earliest I found during my 000b research)  and now Revell brings it back in 2015.The pieces are molded in white, chrome, clear, clear red, soft black tires with water slide decals. There are 154 pieces to this kit and very well laid out instructions. This kit features a detailed 390 c.i. engine with three two-barrel carburetors, whitewall tire inserts, a textured vinyl top, plus cruise control and suspension air bags. Revell and Monogram have released several model kits of the 1959 Cadillac from the convertible version to the hard top version which I think is awesome. The hard part is deciding what order to build them in!  The dimensions are; Length 8-15/16”, Width 3-1/8”, Height 2-1/8.
 

Covered in this Review:  If you want to perfect your build; basic construction; preparing parts for better finishing; alternate assembly sequence suggestions for fit and ease of finishing; complete paint and adhesive selections and applications; test fitting; whitewall insert procedure and detailing; the importance of paint testing; paint repairs; engine construction and detailing; dashboard detailing; authentic interior color scheme and detailing; chassis installation; making realistic tires; using “clear” glue for the windows; front and rear suspension construction and detailing; are all fully examined in this 19 page, full-color Step-by-Step review in PDF format.


100% money back guarantee!

Click the Buy Now link below to purchase the full Step-by-Step review for $2.95 USD.


Important – You MUST click on the “Return to Right on Replicas, LLC” link after you’ve made your purchase to download your review!


Right On Replicas, LLC ©2015 All rights reserved. *All registered trademarks are the property of their respective brands. Follow the manufacturer’s safety recommendations for any product mentioned here.

Lil’ Hot Dogger Show Rod 1-25 Scale AMT Model Kit #908 Review

2015 June 3
by Doug

Right On Replicas, LLC SnapShot Review 20150603*
Lil’ Hot Dogger Show Rod 1-25 Scale AMT Model Kit #908 Review
000-0

Review and Photos by Doug Cole Doug

Poor ‘ole Droopy Dawg (The “Bone” Ranger) didn’t have a chance with the Lil’ Hot Dogger on his tail!  With a massive 400 Cubic inch “Domestic” V-8 and dragster style slicks this is one “Dawg Gone” fast show rod.  This kit hasn’t been produced since the 70’s but it’s back again thanks to the Kats at AMT.  This is a Re-release from the original kit and features a number of optional parts and an enhanced decal sheet.  AMT rates this as a Skill Level 2 for the moderate builder and if this was 1970, when everyone knew how to build kits, I would agree but with some finicky suspension parts and an unusual body rake I would rate this a skill level 3 for builder’s 12 and up.


For the Modeler: There are 95 pieces molded in light gray, Chrome, Clear, transparent blue/red and includes soft vinyl tires and a full decal sheet. The instruction sheet is in the old AMT style of five “easy” steps. There is a nicely detailed motor with an 001 attached transmission and velocity stacks taller than a skyscraper. The chassis is also pretty basic but it includes a nice rear end gear and an independent coil suspension. The interior is sparse, but hilarious,  including a bone shaped bench seat and shift knob with a full set of gauges on the dash. The front rubber consists of three-piece spoked dragster style wheels that you’ll have to align.  The rear racing slick tires are totally awesome and a bunch of tire sidewall decal options are included.  Speaking of decals, there are literally dozens of them with campy dog catcher humor and racing motifs but there’s not much of a place to display them so you’ll have to choose carefully.


This kit goes together nicely and the first three sections; engine, tires and interior are simple and well fitting.  The fourth section for the chassis takes a little extra care.  I found it easiest to use some epoxy glue to set the coil springs into place and tape them 002 into position until they set up.  In the final assembly section (five) I put the passenger cabin together one piece at a time and used some tape to hold the structures in place.  I then used some superglue and accelerant to keep them together.  As a note of caution here the passenger cabin has a 20 degree forward rake on it.  After installing the engine in place using the post and hole at the rear of the transmission, there isn’t quite enough room to lean the cabin forward and not run into the back of the engine.  There are two ways to address this.  Cut off the transmission mount and move the engine forward about 3/16” or take the same amount off the forward edge of the dog cage floorboard.  I used the later solution and everything worked out fine.  The rest of the parts go together well.


There are also some optional parts like the dog catcher’s net that I mounted vertically to the driver’s side and a battery that I mounted to the frame on the right side.  I removed the chrome plating from some of the parts like the shifter, oil pan, radiator bone, catcher’s net and name plate bones for a little more realistic look.  Additionally, I added a scratch-built wired distributor, coil and battery cables for a more complete build.  This kit also comes with a nice little cardboard standup display for your finished model.  The completed dimensions are: Length: 5½”, Width: 3¼”, Height: 4¼”.


Overall: this kit was a sheer delight to build and with the optional items you can really go crazy adding them all into this model.  If there’s one downfall, it is the lack of gluing contact points identified in the instructions.  The watchword here is: be sure to test fit EVERY part!  There was very little flash and since the pieces were flat there were no parting line issues.  There are some sprue joins that will be seen on the chromed parts, so you can touch those up with foil or a sliver pen or strip the chrome and refinish them.  You’ll also need the full array of adhesives for various assemblies.  The extra time and attention needed to make a great display out of this kit is well worth it just for the fun, fun, fun!
000

Right On Replicas, LLC ©2015 All rights reserved. *All registered trademarks are the property of their respective brands. Follow the manufacturer’s safety recommendations for any product mentioned here.

VW Rabbit 1:24 Scale Revell Model Kit #85-4333 Review

2015 May 29
by Doug

Right On Replicas, LLC Step-by-Step Review 20150529*
VW Rabbit 1:24 Scale Revell Model Kit #85-4333 Review
000

Review and Photos by Alan Mann Alan Mann (Thumbnail)

 After an incredible, decades long run, the iconic VW Beetle was replaced. The Volkswagen Golf, or Volkswagen Rabbit in the United States, is a small family car produced by the German manufacturer Volkswagen since 1974. The vehicles transverse-mounted 4-cylinder water-cooled engine and front wheel drive gave it unprecedented efficiency by comparison to contemporary American vehicles. Despite this, sales were slow until sharp increases in oil prices drove a commensurate spike in VW sales. The original Rabbit was a front-wheel drive, front-engine replacement for the air-cooled, rear-engine, rear-wheel drive Volkswagen Beetle. Historically, the Rabbit is Volkswagen’s best-selling model and the world’s second best-selling model, with more than 29 million built by 2012.


For the Modeler: This review covers the Revell California Wheels series kit #85-4333 VW Rabbit in 1:24 scale. This is a direct Re-release (Re-Pop) from the Revell Germany VW Golf. There have been multiple releases in different box arts over the years. Revell 1 rates this as a Skill Level 2 for the moderate builder. There are 141 parts molded in White, Chrome, Clear and includes Vinyl tires and a full decal sheet. The Instruction sheet is in a well laid out Book format typical of the Revell style as of late. There is a nicely detailed motor and full engine bay. The chassis is also highly detailed with a good suspension. The interior is a multiple part set up with separate door panels for ease of detailing. There are two dashboards, a Left Hand and Right Hand drive, to make a foreign or US version. The body is clean and has no mold lines.  The front and rear panels are separate and installed after painting. The decal sheet is very detailed with exterior badges, interior instruments, exterior moldings and stripes, and chrome work. This is a high detail kit. Overall completed dimensions are: Length: 6-1/4″, Width: 2-11/16″, Height: 2-1/4″.


Covered in this Review:  If you want to perfect your build; basic construction; preparing parts for better finishing; alternate assembly sequence suggestions for fit and ease of finishing; complete paint and adhesive selections and applications; test fitting; engine construction and detailing; using white glue for glass parts; dashboard detailing; gauge decal map; authentic interior color scheme and detailing; chassis installation; making realistic tires; using “clear” glue for the windows;  making your own custom license plates and floor mats; carpeting to the interior pan; front and rear suspension construction and detailing; using decal setting solutions for that “painted on” look; adding carpet to the interior; removing the hood hinges for a lift off hood; using Alclad window tint; using floor polish to make perfect windows; detailing the window surrounds; and removing unwanted chrome plating; are all fully examined in this 17 page, full-color Step-by-Step review in PDF format.


100% money back guarantee!

Click the Buy Now link below to purchase the full Step-by-Step review for $2.95 USD.


Important – You MUST click on the “Return to Right on Replicas, LLC” link after you’ve made your purchase to download your review!


Right On Replicas, LLC ©2014 All rights reserved. *All registered trademarks are the property of their respective brands. Follow the manufacturer’s safety recommendations for any product mentioned here.