Right On Replicas, LLC Step-by-Step Review 20150120* Stingaree Showcar Dragster 1:25 Scale AMT Model Kit #AMT38664 Review 
Review and Photos by Alan Mann 
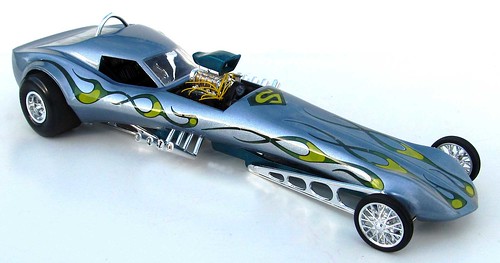
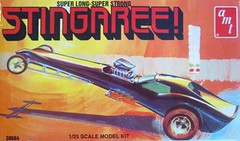
In 1971 AMT created a group of show rod dragster kits that were custom models loosely based on rail type drag cars. They added a customized body and graphics to the dragster and created their own wild-style cars. In 2008 Round 2 under the Auto World name teamed up with Retro Hobby to bring back AMT’s way-out STINGAREE in the Flashback Vintage Model Kit Reissue Series. This wild show rod meets dragster is a 1/25 scale plastic model kit that hasn’t been available since its original release in 1971. They even reproduced the original box and decal art for a real trip to the hobby scene of yesteryear. And it was a LIMITED PRODUCTION run. Â
For the Modeler: This review covers the AMT Kit #AMT38664 Stingaree in 1/25 scale. The kit consists of roughly 80 parts molded in White, Chrome, Clear and Vinyl tires. While the kit does not have a skill level on the box the website rates it Skill Level 2 for  the moderate builder and it requires glue and paint. This is a direct Re-Release (Re-Pop) of the AMT Stingaree and has not been seen since 1971, although it is a 2008 release it can still be found online and in some local hobby stores. A majority of the kit is chrome and the plating is crisp and bright on my sample. The body is a multiple part unit but can be assembled prior to paint work giving the ability to fill and smooth any assembly lines. The motor is fairly detailed and will lend itself to aftermarket goodies easily. The main frame is solid and straight easing assembly issues. The decals are a Green/Yellow flame or Red/Yellow flame choice. Overall assembly is simple and the instructions are a five step process. Overall dimensions are: Length:10â€, Width: 3½”, Height: 2½” Â
Covered in this Review: If you want to perfect your build; basic construction; preparing parts for better finishing; alternate assembly sequence suggestions for fit and ease of finishing; complete paint and adhesive selections and applications; test fitting; complete engine construction and detailing; explaining instruction errors; making realistic tires; dashboard detailing; windshield modifications for fit and finish;  front and rear suspension build sequence; chassis installation; removing unwanted copyright script; using “clear†glue for the windows and glass; comparative kit history; working with body putty; identifying and removing mold lines and ejector tabs; decal preparation and application; installing an aftermarket distributor; frame assembly; choosing a seat style version; using parts-box gauges; removing unwanted flash; how to adding wiring to the engine; a firing order schematic; dealing with warped parts; removing unwanted chrome plating; where to use superglue for added strength; how to assemble a multi-piece body; how to use decal setting solutions; working with full sheet carrier decals; are all fully examined in this extensive 17 page, full-color Step-by-Step review in PDF format.
Click the Buy Now link below to purchase the full Step-by-Step review for $2.95 USD.
Important – You MUST click on the “Return to Right on Replicas, LLC” link after you’ve made your purchase to download your review!
Right On Replicas, LLC ©2015 All rights reserved. *All registered trademarks are the property of their respective brands. Follow the manufacturer’s safety recommendations for any product mentioned here.


