How to build a Resin Kit using the Revell 2009 Dodge Challenger 1:25 Scale Donor Kit Model #85-4220
Right On Replicas, LLC Step-by-Step Review 20141010*
How to build a Resin Kit using the Revell 2009 Dodge Challenger 1:25 Scale Donor Kit Model #85-4220

Review and Photos by Alan Mann 
This review will show you how to build a resin cast trans-kit model conversion. If you’ve been in the modeling hobby for a while you may have heard about resin cast models. Essentially a resin caster makes models from molds and uses resin material and a chemical hardener to create a casting. Most of the earlier resin casters simply used promotional models of older subjects that the injection molders weren’t interested in making because the sales of those models wouldn’t justify the investment in tooling. Some of the top quality resin casters have taken things further and added “phantom†kits to existing versions opening up a whole new level of building fun for modelers.
The aftermarket resin parts companies have been around for years making the kits and parts that the model companies did not and crafting variants of the real cars the auto companies did not. The greatest challenge beyond using resin is finding the right companies to buy from. Aftermarket suppliers are typically home-based businesses for the most part and unlike a major company like Revell the quality control is hit or miss. Finding the “Good Stuff†can be a costly adventure. As home based businesses, many smaller resin companies are part time and your purchase can take a long time be shipped. Also, ordering from these companies can be tricky because the photo you see looks great in the ad but you get a warped mangled piece of trash in the mail. Doing some research on the internet’s hobby forums can steer you to the right suppliers, and given the opportunity you can create a one of a kind build much like this review. Within the review you will get detailed advice on how to work with Resin and how to integrate it into your factory kit. Topnotch companies like RMR (Race Motor Replicas), offer fast service with a superior product. They will also recommend what kit to use as a donor to supply the “extra†parts for your model.
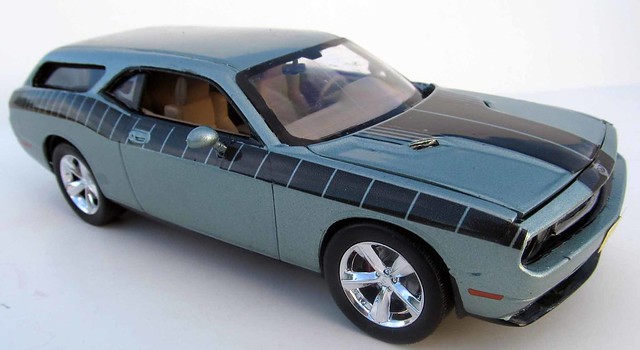
On February 6, 2008, Chrysler introduced the third-generation Dodge Challenger. The new version was a 2-door coupe which shared design elements with the first generation Challenger. The car is only a 2-door sports Coupe, but WHAT IF, a wagon, was available for the family? Building a Resin Conversion allows a modeler to create that “WHAT IF†car in miniature!
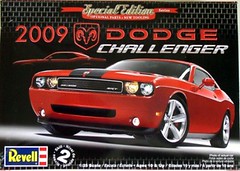
For the modeler: This review is based on the Revell Special Edition Series 2009 Dodge Challenger 1:25 Scale Donor Kit #85-4220 and the conversion resin Challenger Wagon Trans-kit from RACE MOTOR REPLICAS. There are 109  parts molded in White, Chrome, Clear, Rubber tires and Metal axles. Revell released this kit in 2009 as a NEW RELEASE TOOLING. It is still available and can be found in Hobby Shops and online quite easily. The kit has a simple but nice looking motor. The interior is a multiple piece unit with good details. The chassis is well detailed in looks but simplistic to build. The body is a multi-piece unit and looks good. Overall the car looks correct when built, BUT we are not building this car kit entirely! This review will stray from a standard build as we are using a resin conversion kit for the body replacement. We will make this standard Challenger into what is known as a Phantom Wagon. This is called a Trans-Kit and is a DIRECT REPLACEMENT conversion. The kit comes with all the parts needed to convert the “Donor Kit†into this phantom version. The kit is from RACE MOTOR REPLICAS owned by Ron Andrews. The company is based out of Meadville PA. They can be found at: http://www.rmrmodels.com/. The kit donor kit is rated a Skill Level 2 but a resin conversion should be considered a Skill Level 3 build for the advanced modeler. Overall dimensions of completed build: Length: 7-15/16″, Width: 2/3/4, Height: 2-1/2.
Covered in this review: This review will show you step-by-step, how to build a resin trans-kit model from start to finish. Differences between resin and styrene model parts; modifying the body to work with the Revell kit parts;  basic construction; preparing parts for better finishing; alternate assembly sequence suggestions for fit and ease of finishing; complete paint and adhesive selections and applications; test fitting; using floor polish to make spectacular window glass; making custom license plates, decals; floor mats and windows for your model; adding window tint; using “clear†glue for windows; detailing the engine bay; dashboard detailing; making realistic tires; aligning directional tires; removing unwanted copyright script; wet sanding; airbrush advantages; engine construction and detailing; how to extract residue from resin castings; suspension construction and detailing; use of flocking for interior detailing; using setting solution for decal application; expanded Challenger background; mold seam and ejector pin identification and repair; detailing the instrument panel; decal preparation and application; are all fully examined in this 23 page, full-color Step-by-Step review in PDF format.
Â
Right On Replicas would like to thank Dave Burket at Model King for locating the donor kit so quickly for this review. His tireless efforts at preserving and expanding the hobby are very much appreciated. Additionally, kudos go to Doug Gallinat at ATM Hobby Club for arranging and shipping kits and supplies.
Click the Buy Now link below to purchase the full Step-by-Step review for $3.95 USD.
Important – You MUST click on the “Return to Right on Replicas, LLC” link after you’ve made your purchase to download your review!
Right On Replicas, LLC ©2014 All rights reserved.
*All registered trademarks are the property of their respective brands.


